Saturday, April 30, 2011

Oh #$^%$&!!!


I'm cutting some dovetails here for a blanket chest for my daughter, Erinn.  You can see her picture on my site under--About us.  I usually cut them on the table saw using a fixture that holds the piece vertically, it works really well and is fast and precise.  I've tried the the Leigh Jig, and I will still use it for a whole dresser, for example, but I don't use it that often, so it takes a while to re-learn it.  So the table saw fixture works, although big pieces can get unwieldy.


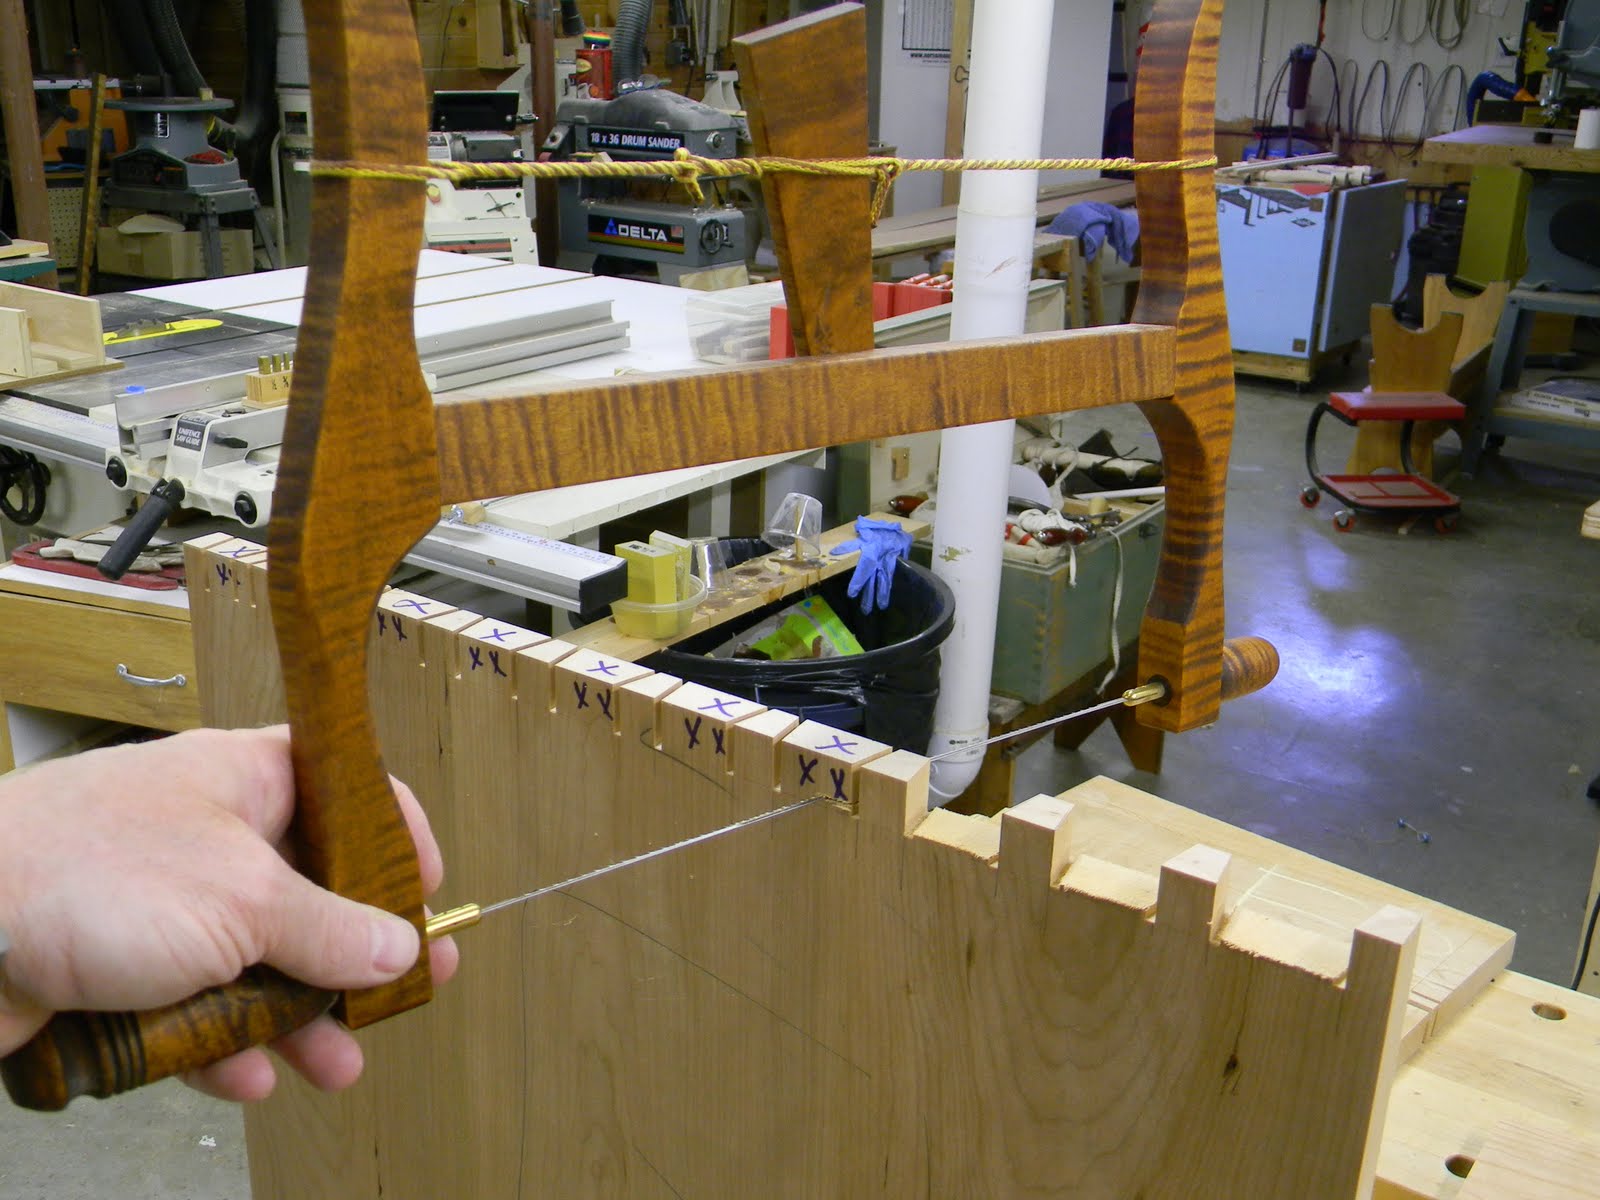
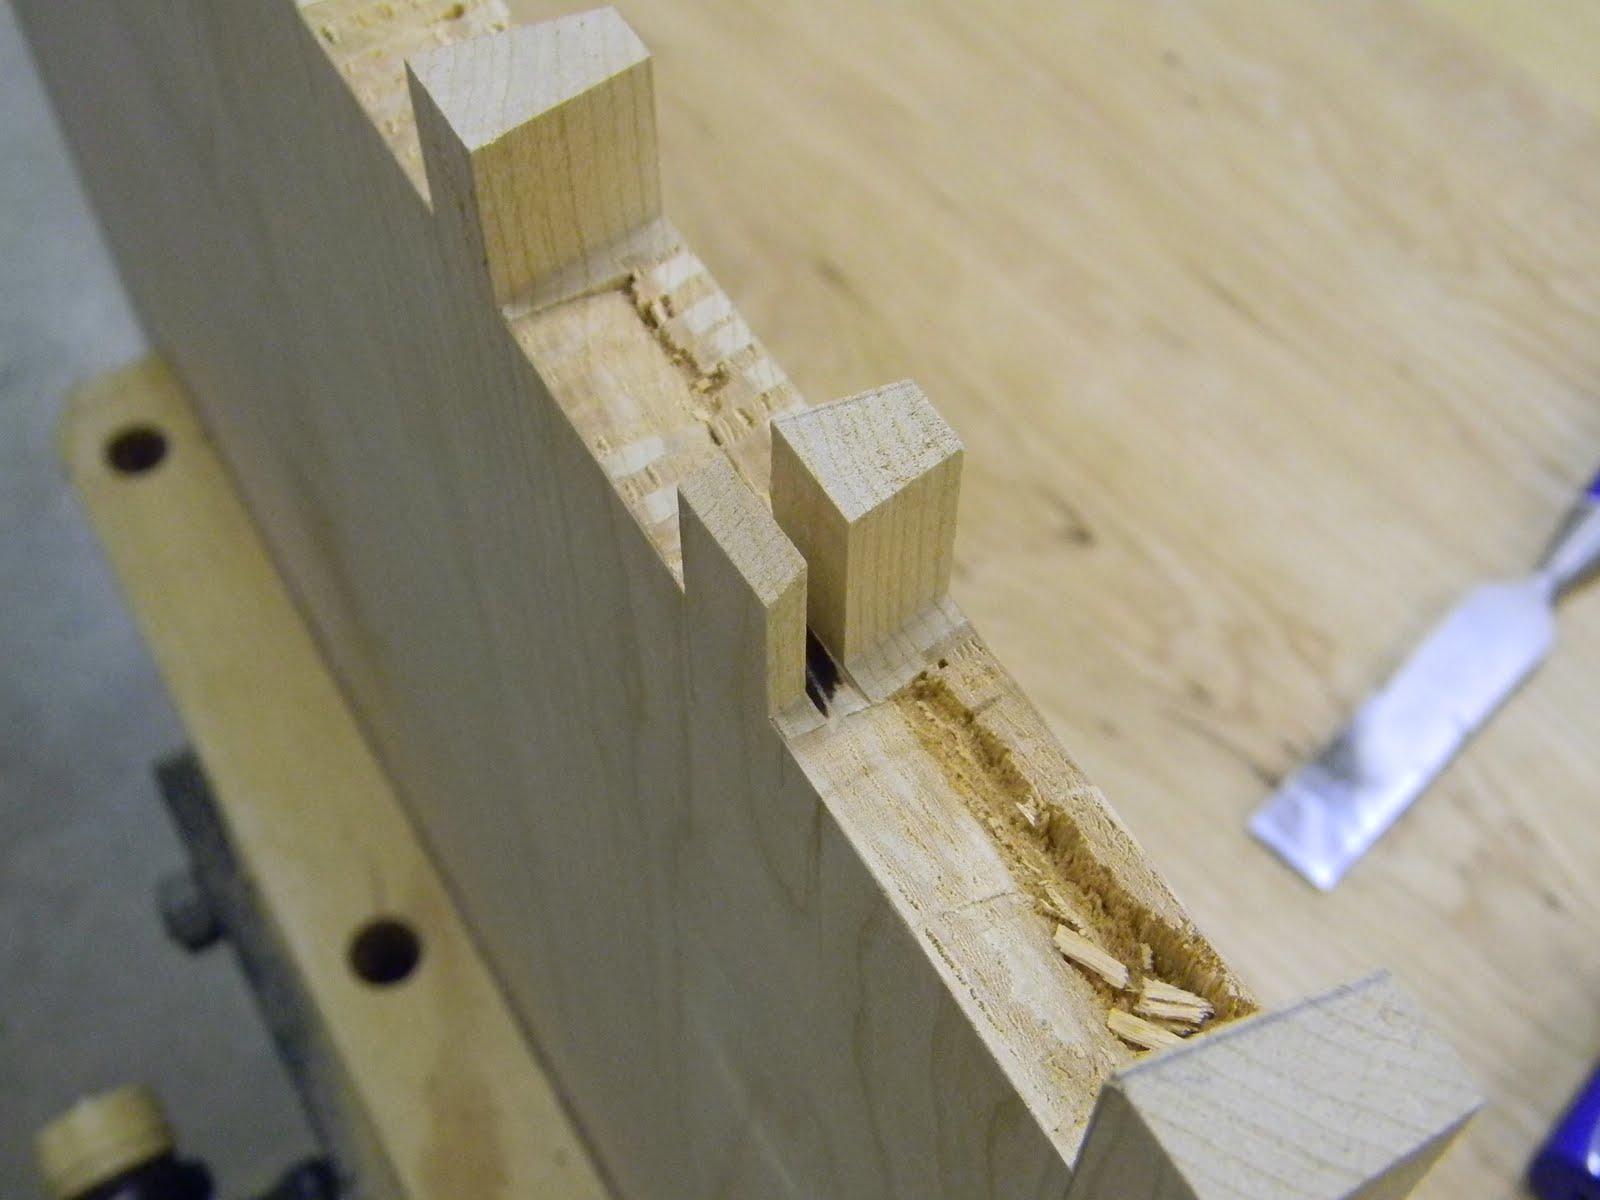
Here I'm cutting the waste out with a little saw I made.  One thing I like about the table saw is that the cut is big enough to easily get the saw blade in, and it really does speed up the chopping.


 And here you see what happens when the pieces get big and unwieldy,  Oh @$$%%#!!  I caught the tip on the table saw blade and blew off the front.  What to do?  I didn't want to scrap the whole piece, so I fixed it as follows.


 I used a biscuit joiner to cut down into the end of the pin, slicing off the blown up part.   Below you can see how nice a cut it makes.  I clamped it on to prevent making a small problem worse.   Then chisel in from the face.


Maybe the most important part is picking a piece that matches not only the color but the grain pattern as well.  Just take your time and hold the scraps pieces up the half pin and pick the best match.


Clamp on the new piece, leaving it fat and wide and long until the glue sets up.  Don't rush the glue, but once it dries it's plenty strong.


 Then after the glue is fully dry, back to the table saw and re-cut, and vi-o-la! perfect patch.  Once the chest is assembled,  you'd be hard pressed to find the fix.


 Here you see the dovetails in line, the center one is the patched one, and I won't tell you which one on the below shot.  The chest is coming along nicely, the panels look great and I can't wait to get the finish on it.  Cherry is really a wonderful wood, and it only gets nicer with age.


On the home front, the shop mascot, Forrest, had to have surgery to remove some stuff he at that blocked up his G.I.  He came thru the surgery well and seems just fine now.  Kinda scary, though.  There is so much in life we take for granted, but you just never know.  Also, I'm reading IronWeed by William Kennedy.  I read it in an English Lit. class in college, and decided to re-read it.  A dark novel set in early 1900's Albany.  Not for the faint of heart.

Sunday, April 17, 2011

New Trick


Here's a look at the leg joint I used on a table I made over the last little while.  Normally, and in the past, I would have done some big mortise and tenons, but I wanted to have something that would be a little easier to move.   So I  used hanger bolts...


 Which are basically a lag screw on one end and a threaded bolt (5/16 on these ones) on the other.  I band sawed a flat, carefully marked the hole location, and used the drill press to drill the holes.  A little wax, and I drove them in by double nutting them and using an impact driver with a 1/2" socket.  Beats a wrench any day!  You can see here how I plowed a couple dadoes to let in the piece that the leg bolts to.  The angled piece is both screwed and glued in place.  And then the bolts go thru and tighten up.


 And here's the finished product.  What impressed and surprised me was how tight this joint is.  I had my doubts, but this is rock solid, and the legs can easily be taken off and stored inside the apron and top, should you ever have to move the table.  The problem with tables is that you are moving a lot of air.  But by securing the legs to the table, you're just moving a large flat bundle, no thicker than than the top would be anyway.  So I learned a new trick.  And if you didn't have the skill set or tools to make full blown mortise and tenons, you could use this method and end up with a leg to apron joint that is rock solid and easily moved.


 Here are some ladles I've been making out of scraps.  I draw the rough outline by eye, saw out on the band saw, and spin the handle on the lathe.  The I shape the paddle with a band saw and finish with spokeshave.  They don't take long to make, and are a good way to use scraps.  I don't measure anything so they will all be a little different.


After they are scraped or sanded, I finish them with Walnut oil, and then off to the kitchen.  I carve facets on the end with a small knife, sort of a signature.

Sunday, April 10, 2011

Maple ( Walnut ) Ice Cream


 Well, the sap is about over.  It was a weird year, I got a little more syrup than last year, about 2 1/2 gallons, but the sap never really seemed to run all that well.  Good, but not great.  But the sugar content was high, I ran a couple batched that were 24 gallons to one, which is really high.  Less sap, more sugar, all worked out in the end.  And the end is here, pulled the taps yesterday and cooking the last batch as I type.  You can see here how the syrup gets darker as the season progresses.  If you can, get to the sugar shack as early as you can, or ask for early syrup, there is a difference.


 One thing we did last year, and believe me it will happen every year, is make maple walnut ice cream.  Boy is it good.  Cat is making it up right here...


What's the key?  Well, I'll tell ya..


Wet walnuts!


Walnuts tossed with maple syrup...

 Here's where the magic happens, an electric ice cream maker.   Works a lot better than the hand crank one we used when I was a kid.  I always thought that was the best ice cream, but this maple walnut is the best!

 Before....


 After!

Sunday, April 3, 2011

Domino


As I get older, I know I'm not getting smarter, but I'd like to think I'm getting wiser (not sure my wife would agree).  And with that in mind, here's a shot of a table top that I'm doing.  I found some wide red birch boards for the top, and in the past I would have tried to glue the whole thing up in one shot, nowadays  I glue two boards together, then add a third, and finish off with the forth.  I really is a much less frantic approach.  And I think it save time in the end because I'm able to get the boards to line up better, which results in less planing and sanding.


This helps a lot too.  It's a Festool Domino.  Essentially it cuts a slot into a board, be it the end or side, and then you insert either a purchased floating tenon, or you can make your own.  On this table, I used the purchased Dominos to help with the edge to edge alignment.  By cutting slots and inserting the dominos, the two pieces will be perfectly level when you clamp it up.  A biscuit joiner will also work.  It works about the same, but the biscuit (a football shaped piece of compressed plywood) is quite a bit smaller.  Which is fine for edge to edge, because you really don't need the strength because the glue joint is stronger than the wood.  I use them just for alignment, and it does help.


 Here's another use for the Domino.  It cuts slots (mortises) into the end of the tabletop.  I'm gonna put on a breadboard end, the piece laying on the top.  This goes directly on the end and does two things.  One,  it covers the end grain of the table, and two, it keeps the table flat.  The piece is glued in the middle, and pinned towards the end.  The holes have to be slot shaped towards the edges to allow the top to move with changes in humidity.  Anyway, the purchased dominos (tenons) I think are a little small for this application, so I made bigger ones out of some scrap birch, and glued them into the slots.  Then, today hopefully, I will cut the matching slots in the breadboard, and glue the center and pin the edges.  If I were to glue it all the way across, the top would split.  The breadboard had to be able to float. 


This shows how I used to do cut breadboard ends.  I would mill a slot all the way down the middle of the board, and slide it over a mating notch (rabbet) on the table top ends.  Then glue the middle and pin the ends.  There are a lot of people who do it this way and there are a lot of woodworking books that tell you t do it this way.  But when you look at this piece wood, there simply isn't much strength in this piece of wood.   Case in point-- I made a coffee table for our house, and my son sat down on the end on the top, and snap,  broke the breadboard right off.  I had another break because the owner moved the table by lifting on the breadboard.  Granted, probably shouldn't have done that, but still.  So now, I cut slots and leave some meat between the slots, which should prevent this from happening again.  Always evolve.


 Here are a couple shots of a piece that joins the side of a big hutch I'm also building.  I opted for dovetails on the ends of the rails for a couple reasons.  First, it hold the side together and prevents them from bowing apart.  Second, I didn't want to see any fasteners on the outside, because then I would have to run a molding around to hide the fasteners, which I didn't want.  So by using the dovetails, I just glue it up and tap it into place, no fasteners and it provides a mechanical means to hold the case side together.  I just cut the slots with a router and trim the dovetails with a bandsaw.  I'm sure there are people who wonder why bother with dovetails when you won't see it on the finished piece.  I do it because it's the best joint to use, regardless of whether or not you see it.


 Couple more shots.  The back piece is made the same way, and together they hold the case sides together.  I'll post more pics of this hutch as I go along.  It should be really nice.  I'm also working on a new chair design, and a cherry bench with slip (upholstered) seat.  I've never done one before.  The bench and chair I hope to have done in time for a furniture show in June in Lincolnville Point, Camden area, Mid-coast Maine, http://www.mainehomedesign.com/midcoast-show-2011.html.  If you plan on being in the area, be sure to check out the show, and stop in and see my booth.  It's one thing to see my furniture on the website and blog, but you really should see it live to appreciate it.