Wednesday, September 28, 2011

Fumed Oak Bench

Here's a small bench I recently finished up.  The legs are white oak, the back rails are red oak, and the back slats are sycamore.  The seat is reed woven in a herringbone pattern.  For this piece I fumed the oak in a small tent using ammonia.  This process was used widely during the hey day of the Arts and Crafts movement, including companies such as Roycroft and Stickley.  

 I'm not really sure about chemistry, but the short version is the ammonia reacts with the tannins in the wood resulting in a beautiful rich brown.  My friend Pete Galbert also uses this process on butternut.  Above you can see the bench before the fuming process.


 Here's the tent ready to go.  All I did was fill two small bowls with household ammonia and replaced it daily for a week or so.  It's pretty nasty stuff, so be careful.


And here is the full frontal view of the fumed bench with a wipe-on varnish and the seat woven and done.  I did these shots myself, so better ones to follow.  Overall I was pretty happy with the bench.  I made a few mistakes that I fixed up and I'll know better next time.  But the color and richness is really nice.


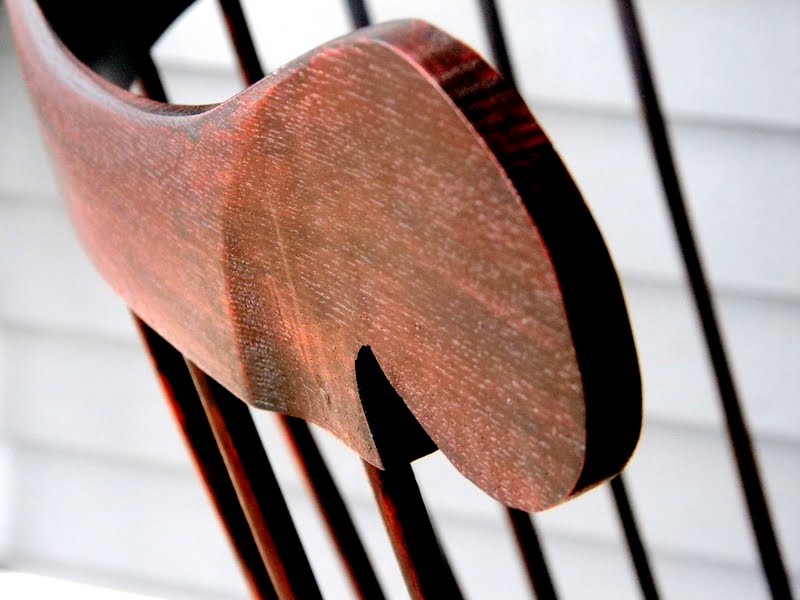
 Below you can see (hopefully) the difference between the white oak post, the red oak rails, and the sycamore slats.  If I do do another one, it will be all white oak, no red, and I will keep the sycamore...it turned a beautiful reddish. 


Here's a good look at the seat.  I did a small chair a few years back with a reed woven seat  and swore I'd never do it again.  But here I am.  I did tape up my finger tips, the reed will take the skin right off, especially because the the reed must be wet when you weave.  The seat looks great with the herringbone pattern, a simple method of over three, under three, over three etc.  It always amazes me how strong these seats are.


Like I said, I'm happy with the bench.  I want to start doing more contemporary pieces as the more traditional pieces are simply not selling.  I also feel that with society becoming more and more urban, that maybe pieces like this bench and the rocker I posted a few weeks ago, that maybe those pieces will fit into an apartment setting better then a more traditional Windsor.  At least that's the hope--time will tell.  Well, I'm gonna  watch the Red Sox game, hope they end their September swoon and pull this one out, finger crossed..

Oh,  how about my beloved Buffalo Bills!  That win over the Pats was a long time coming, hope they can hold it together and have a good season, GO BILLS!!!  and I'm not jumping on the band wagon, I've been a fan since Jim Kelly and Marv Levy were there.

Monday, September 5, 2011

Cherry Hutch with rat-tail hinges


 Here's a piece I finished awhile back.  I really have to do a better job of posting and putting pieces on my site, but at any rate here it is.  It's a cherry hutch that I have wanted to build for a time now to store out plates and such.  The piece is solid wood, which does present some challenges but it really is better than plywood.  I think, and this is just my opinion, that over time you get a deeper red, a deeper color with solid wood than you do with plywood.


On this side shot you can see the pegs used to hold the shelves in place.  They hold the piece securely and provide some visual interest to the side.  Over time, the cherry will deepen and the pegs will become more subtle.


Here you can see the reproduction glass I used on the piece.  The waves and imperfections add an authenticity that modern float glass can not replicate.  Of course it costs more, but few things look better than old glass.  And few things look worse than modern float glass.


 This is called a rat tail hinge.  The tail at the bottom has a small wood screw that goes into the stile and the top has a ring with a threaded stud that goes clean thru the stile and is secured on the inside with a small nut.  The flag part is screwed to the door face.  The hinges weren't really hard to install, just fussy.  In the end they look spectacular...they really pop the piece, definitely worth the time and effort, and cost.


 Here you can see more the hinges and how they frame the doors.  You can see also the handturned knobs.  By turning them myself, I can ensure a color match and I can also graduate the sizes, that is to say I can make the lower ones larger and the upper ones smaller.  It's a subtle difference but it does help make the piece better.


More hinges.  You can see the base design too.  I think the acorn style cut out adds a little flourish.


As you can tell, I really like the hinges.  We went to Kings Landing yesterday, a historical settlement that serves as a living history site.  I hadn't been there since I was a kid.  They had a scores and scores of Windsor chairs.  The curator wasn't there, but I do hope to contact him so that maybe I can go back.  I was told that they have many more Windsor chairs and furniture pieces that are not out in the houses.  I would love to see them all someday.  The blacksmith at the site said that he had made these hinges before.  I would like to see that.  If you live in the area, you should go to the settlement.  Our 6 yr. old had a good time there... as long as they have horses, she's all set.  It's about 30 min.  from Houlton, Me.

Saturday, September 3, 2011

More of a Good Thing


 Here are some pictures of another rocking chair.  This one is pretty much a shield seat Comb Back, much like the Philly Comb Back.  The rockers are actually the ones that began life as the rockers for the other rocker.  I mis-measured the rockers for that rocker but they fit great for this one.


 I like the other chair, the Heirloom Rocker but the turnings on this one are really nice and make for a more classic looking rocker.  The finish is black on red with only one thin coat of black.  I wanted more red to come thru and while this happens when the sun hits it, it really looks like a reddish brown, which is really pretty.


 I don't really consider myself a great carver, but these knuckles came out nice.  One admission, I use a rasp and file and a scraper more than I care to admit, but I remember a quote from Sam Maloof who said I use whatever tool is the best, be it a chisel or my teeth.  This is essentially my theory on tools.


In some ways the rocker is easier to leg up than a regular chair, and I think a lot easier than a box stretcher chair, that is to say one with four rungs like my rodbacks.  I drill and ream the holes, insert the legs and then mark where the rockers will land using a 1/2" thick plywood pattern.  I then clamp the leg upright and use a router and a 1/2" bit to cut the slots.  It fits great and is much more accurate then a handsaw and chisel.  Another example of the best tool for the job.


 This is a tricky cut (the pic on the right) to make but it really does add a lot to the ears.  It thins them so they are the same thickness top to bottom and also give a nice shadow line on the back.  On the left you see the volute.  One thing I try to do is have the point on the horn point back towards to the chair.  Subtle but it does make a difference.


I was happy with the way this chair came out, it is really comfortable.  The back spindles flex and the crest supports your head perfectly.  A great chair to rock a baby...the only problem is staying awake!  At the show in Rockland a few weeks back, people seemed surprised at how comfortable they are, several people commented that oh, they are comfortable for a wooden chair.  I received several orders, which is the best part.