Whenever I build doors with glass, if the clients budget and taste allows, I like to have true divided lite panes. They just look so much better, especially when the client or a friend opens the door and sees that it indeed has divided lites. I think people have become accustomed to snap in grills, so there is a surprise when they see it.
These doors are a little tricky because they have a molded edge, a quarter round with a fillet, so the end of the mullions ( the horizontal pieces ) have to be coped, that is, shaped to fit the edge pieces. I'm not really gonna get into that, that would be better covered in a class. I am going to describe the process I use to glaze the glass panes. You could of course use wooden strips to hold the panes in place. I prefer putty, but either is fine.
Below you can see where we are headed. A smooth inlay of putty that meets in what is called a masons miter. One thing to keep in mind is that the edge of the putty has to be inside the wood edge on the other side of the glass. If you don't cut the putty inside this edge, it looks horrible...ask me how I know this. What happens is you can see the putty from the outside when the door is closed. You can chip the putty away to move the line, but that looks bad when the door is open. Better avoided in the first place.
Another shot of the finished putty, smooth with a crisp corner. You can see the wood on the outside of the glass here, well inside the putty line.
For putty, I like to use Durham's Rock Hard. It's available most everywhere. There's lots to like about it---it dries fast but not too fast, is cheap, non-toxic. The only downside is that you have to mix it with water but I see that as a plus because that way I can get exactly the thickness I want. I like peanut butter, maybe a little stiffer. You can't have it too thin because you can't cut it...the cut putty will just blend right back into tapered part. What you want is to cut it, and have a line that clearly separates the putty glass from the waste.
Here you can see what I'm talking about. First, you pack the putty into the area above the glass and form roughly a triangle of putty. At this point you don't need to be too careful. Just get some putty on your knife, pack it in like you're trying to scrape the putty off. Don't get too much or it'll be a mess. Then using a clean putty knife, run the edge down the length of the pane, smoothing it out as you go. When you get to the corner, leave the tip on the glass, and in one motion lift into the corner, creating a nice mitered corner. One trick is to clean the putty knife and lick it before smoothing. I provides just the right amount of lube to smooth it out. I'm pretty sure the putty is non-toxic, probably should check. Another important thing is to leave the cut putty until it's dry and then use a window scraper to remove. Below you can see the cut putty.
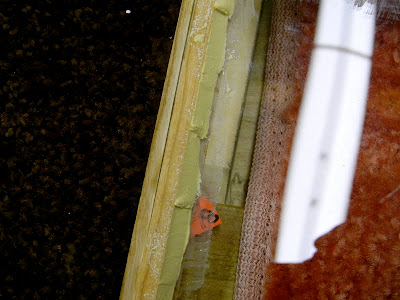
Below you can see the roughly packed in putty. If you look closely, you can see the wood that you must stay inside of--otherwise you can see it from the outside.
This is the putty knife I use, pretty standard tool. I don't use the bent part, I use the straight knife end, not really sure what the bent end is for. Maybe someone can explain it to me. I like the knife end though, really works well.
One last pointer--I place a duct tape covered brick on the pane. I glazed a door once, and when I looked at the finished outside face, I saw that some of the putty had squeezed out between the glass and the door. I had to chip out all the putty and start over, ahh the joy of doing things twice.
Above you can see how I usually hold the doors closed. On the left you can see a spinner that goes on the inside. The top part mates with a groove in the underside of a shelf and hold the ( usually ) right door closed. A rebate allows the the left door to close over the right door and hold it closed. Finally the left door knob turns and has a finger that goes behind the other door. I made that sound a lot more complicated than it is. It really is simple and hold the doors flat and true. All this takes times and takes patience to do, but it is what separates an average piece from a true heirloom.
Things have been busy around the shop lately, finishing up this piece... a really nice order from a recent show and a couple chairs from the same show, and football coaching coming right up. I have another show coming up in Rockland in early August. I also am trying to get a rocker done for that show, and I have a couple other things. Be careful what you wish for!!


Nice one! A detailed blog that help us to do our own repair if there something wrong in interior glass doors, for me this is enough info concerning on this kind of glass door.
ReplyDeleteThanks for this nice information about glass glazing...
ReplyDelete