I loved you like a man loves a woman he never touches, only writes to, keeps little photographs of.”
― Charles Bukowski, Love is a Dog from Hell
Here is the finished table from the breadboard ends post. I was happy the way it came out, and the client was very pleased. Only now, I want to build one to sit exactly where this one is so we can play games. One thing I should mention, and really should have gotten pics of, is the horrible scratching that the drum sander put on the top. I never saw it until the stain went on and then Wow, there it is.
So, I sharpened up a scraper and had at it. It only took about ten minutes ( and one blister) to scrape off the scratches and then I sanded it to 180 grit, re-stained and then varnished. It's amazing how some things in life that are supposed to save work actually create more work, like recycling.
If, not when, I get around to making a table and chairs, the chairs will be like the hoop-back to the left. They will tuck under the table and are easy to make, relatively speaking.
As an aside, if you have never read any Charles Bukowski, you should. He was a working man's poet, rough, Garrison Keillor said, aptly, that he looked "like a gargoyle" but I love his writing. Check him out.
Tuesday, July 17, 2012
Sunday, July 15, 2012
Plank Salmon
“I feel like a wet seed wild in the hot blind earth.”
― William Faulkner, As I Lay Dying
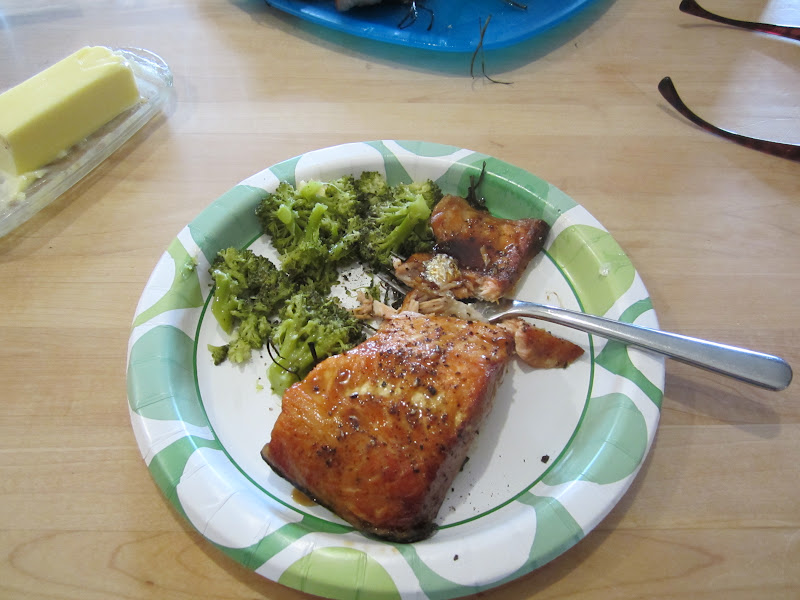
One of my favorite things to grill is salmon on a cedar plank. It is really easy, and the combination of salmon and cedar smoke make a perfect pair. For some other fish, delicate ones like haddock, a maple or poplar plank works better, but the heavy taste of salmon needs cedar. You can buy these planks, but on a trip to an ash log for some chairs, I noticed that Robert had some cedar logs so cut some pieces and then split them up for the planks. This is exactly the way that cedar shakes are made. The butt pieces, about 18" or so, are split using a froe and froe club, then a 3/8" piece is popped off, then the log is flipped lengthwise and then repeated. In short order I can get enough pieces for the whole summer's grilling.
I cut some fresh chives to create a bed for the salmon pieces. The onion taste is interesting mixed with the cedar smoke. As an aside, I planted the chives to deter the mice and moles that were eating my Lilly bulbs. It worked for that, but now the chives are everywhere!
Soak the planks for a couple hours in water, and grill them until they start to smoke and burn a little. Remember---no fire, no flavor. Grill for about 12 minutes at 400ยบ or until the salmon flakes apart with a fork.
I made a sauce of Soy sauce, maple syrup and a little dry mustard. And it was de-lish! They only thing it needed was a little wasabi, so next time I'll try that as well. But it was fine this way, really moist and smokey, perfect.
Sunday, July 8, 2012
Bread Board Ends, Part 2
"Being Irish, he had an abiding sense of tragedy, which sustained him through temporary periods of joy.”
-W.B. Yeats
I've been building tables with breadboards for years now and had usually used full on mortise and tenon along with what amounts to a spline. It works, and is traditional, but to cut the tenons on a large panel is tricky and time consuming.
I tried then using a Domino, just that but I felt the floating tenons were a little too small, so I now use a different method that uses Domino floating tenons and screws. Above you can see the mortises cut but not all the way thru. I leave about 3/4" at the side that contacts the panel.
Above you can see the Domino's that only serve to line the pieces up. I do glue them into the panel, but not the breadboard.
Here you can see the mortises with the screw holes drilled and slotted out on the backside ( the part that goes against the panel). Another view below.
Then line the breadboards up, clamp, and mark the screw holes. Remove and pre-drill the holes, then finally drive the screws in with a little wax. I used gold star drive screws, but I think 2 1/2" pocket hole screws would be a better choice. You may not even have to pre-drill them.
Then cut and mill some plugs to fill the mortise and a little glue then tap them in. Below, you can see the finished table end. It really pulls the breadboard tight, and still allows the panel to move with the seasonal changes in humidity.
Sunday, June 17, 2012
Crooked knife
Charlotte: [Bob is recollecting when he first saw Charlotte, in the elevator] Did I scowl at you?
Bob: No, you smiled.
Charlotte: I did?
Bob: Yes, it was a complete accident. A freak. I haven't seen it since. Just that one time.
[Charlotte smiles]
Bob: Like that, but bigger... bigger... mm-hmm... well, not that big!
fr. the movie (2003)-- Lost in Translation, written and directed by Sophia Coppala
I'm not much on garage sales, at all. Some people are and that's fine but I am trying to reduce my pile, not add to it. But my oldest daughter has wanted a pogo-stick for awhile and the other day I saw one at a sale so I stopped. I bought the Pogo-stick and as I was leaving I noticed a beautiful crooked knife on a table for $1.00, so of course I bought it, thus adding to my pile.
For those of you who may not know about these traditional Indian tools, they are essentially a one-handed draw knife, which frees the other hand to hold the work, seen here.
I believe this knife, and perhaps all knifes, were intended for baskets. I say this because the blade is double bevel, thus making it a wedge. Indians around here and in the Bangor-Old Town area use Brown Ash to make their baskets. When pounded the trees separate at the annual growth rings, and then these strips are pulled apart, making strips that are then used to weave. A crooked knife is used to further split the splint, making thinner pieces. It is also used to shape the handles and the rim pieces.
I have seen a few crooked knifes but this one is a little different. It has a brass ferrule, usually they are wrapped with fine copper wire, and the handle has ribs, beautifully done, and a little swelling where the neck joins the handle. Obviously this was a special tool.
The advantage of a crooked knife is that they can be used one handed. I wonder if they had shave horses if they would have adopted two-handled draw knifes instead. I don't think this tool will see much use in my shop, but it is a beautiful tool.
Tuesday, June 12, 2012
Good set of oars
" At sea, I learned how little a person needs, not how much. "
Robin Lee Graham
I decided early on that for my boat I wanted to build my oars. The book I am using to build the boat, "Heidi- a 12' skiff for Sail and Oar" by Rich Kolin, has a great chapter on building them so I had at it.
Above you can see the octagon layed out to form what will eventually be a round, 8, 16, 32 and then round, just like the spindles on my chairs.
Above you can see the neat little gauge, a spar gauge, used to lay out the lines. It traces two lines regardless if the pieces taper or not.
Not sure if you can see it but this piece of spruce had some birds-eye in it.
Octagon layed out and planed. I had planned to use a draw knife more but the grain was funky so I used a spokeshave instead. Change of tact, you might say.
Rounded off with a spokeshave followed by paper.
I recently made a new shave horse (next post) so students wouldn't have to share. I also made it a different style so they could try both to give them a better idea of the styles. This style does much better at holding long pieces, like oars or the back of a settee I'm building for a client.
Here are all the tool used for the oars, save the bandsaw and paper.
I really like this Stanley block plane. The mouth really opens up and it has a Hock blade, the best blades on the market in my opinion.
Here is the blade and tip. I am really looking forward to using them soon. All that's left on the boat is the outside paint. But I have been really busy with chairs and classes and life, but in the water by the 4th..."second star to the left and straight on 'til dawn"
Subscribe to:
Posts (Atom)