Showing posts with label Bending. Show all posts

Monday, June 14, 2021

Rocker Blade Jig


If you can't change it, you got to stand it

Ennis Delmar, BrokeBack Mountain, Annie Proulx


So I come from a casework background and as such I try to use that knowledge and those tools to simplify or at least speed up certain aspects of chair making. 

A good example is how I make my rocker blades. Years ago I made this jig to cut some large circles out of plywood for some project and I altered the dimensions to work with cutting the rocker blades. 


The base for the jig is this 12 by 52 inch piece of ¾ plywood.  Its fastened to the bandsaw table with a couple bolts drilled thru the table. 

The hole that the rocker pin goes in is 46 inches from the blade. As you have probably guessed the bottom of the blade is a section of a circle which seems to work fine and 46 does give a nice steady rocking motion.  


I built this one with looks like mostly pocket screws but anything will work provided the bottom stays flat and free from obstructions.  

Below you can see the top side. Its just a big T shaped piece that measures 52 on both axis.  The pin hole is 46 away from the blade and a couple toggle clamps hold it firmly in place. I figure out the angle of the front legs where they meet the floor (which is the same angle as the stretcher) and set the bandsaw table to that angle.  Then clamp it in place and cut it. The typical size of the blank is ½ x 6 x 42 which seems to work well. Also please note that there is a left and right. 

Further note the blade pattern I use is from Pete Galberts rocker plan found in FWW. I use the same pattern on all my chairs the only difference is on smaller chairs I shorten the length a little.


Sunday, October 9, 2016

So this happened

Here's an interview the Bangor Daily did about me. I tried to talk about not only chairs but also the nature of art and craftsmanship. 
https://m.facebook.com/story.php?story_fbid=1103360949739817&id=100001977660888

Thursday, November 21, 2013

New Old Digs


Time marches on. Don't waste it assuming you'll always have more.

Dr. Z


Some of you may have known but for the last 15 years I have been running dry kilns and a solid fuel low pressure boiler.  Above you can see the boiler house.


Here's one way to bend wood. This birch board fell out of a pack and was placed under the third pack.  As the wood dried it of course shrank and in doing so the board was bent.  Gives you an idea how much wood moves when it dries.


Above you can see the moisture meter I use to check the progress of the drying.  


Above you can see the control panel for one of the kilns.  Below is the write up of the schedule I run to dry birch and maple.  The air temp. is called the dry bulb and the humidity level is called the wet bulb.  These two values are relatively close initially and pull apart as the wood dries. Otherwise the wood would dry too quickly at first and the wood would split and develop stresses. 


Below a better look at the controller.  This one is a Partlow two pen ( top value is the dry bulb and the bottom one is the wet bulb) circle chart.  It tracks the progress of the wood as it dries.  While I never really wanted to run dry kilns per se, it has allowed me to learn how wood dries and how to use that  to my advantage when building chairs.


Saturday, September 7, 2013

More Chair Seats


Any idiot can handle a crisis, it's day to day living that wears you out

Anton Chekov


It's always difficult, very difficult to predict what chairs will sell.   I like Windsors and while they will always be my favorites, I remember thinking as I was loading for the last show, wow, that's a lot of black chairs.  I like milk paint and the different colors and effects you can achieve with it.  That having been said, I think I should add some different styles with a clear finish to my line of chairs.  Maybe something more "machine" based than all hand tools.  Again, I like using hand tools but classic Windsors may not fit every taste, budget or house.  Long story short, I'm trying to add some chairs that are maybe less expensive and ones that can be easily built in batches of 4 or 6 or more.

Its important when doing batch runs that the machines ( table saw, jointer, bandsaw etc..) all be set up very carefully and all the pieces all be exactly the same size.  If you start adding variances to the pieces, all economy of scale is lost.

Another thing I decided was that obviously the seats cannot be hand carved.  So for this chair design I decided to make a form and then vacuum press the 1/8" pieces to the contour I wanted.  What would be ideal is if the local veneer mill would sell me full size 4x8 sheets of 3/16" veneer.  Then, no glue seams and I could run the seat grain left to right, which would match the grain in the back pieces.  But until I look into that, I simply re sawed some pieces, maple in this case, to a strong 1/8" and drum sanded them and glued them up using my press.  I got my bags and pipe seals and the press seen below from Veneer Supplies.  The vacuum press works great and all you need is a compressor.  Best part is there's a valve that keeps the vacuum constant at about -28 hg.  I used a hand pump one before but it would always lose the vacuum.


Below you can see the chair prototype, a pretty simple side chair.  I hope it works to be a comfortable and visually interesting chair.  I further hope it doesn't look a chair you got at a garage sale for 20 bucks.  Time will tell.


Here is the prototype with the pressed seat.  The seat came out plenty strong even though it's only 1/2" thick.

The legs are going to be bent lamination as well.  I actually had to steam them first, then bend them, then let them dry some, and then I did another vacuum press but more on that later.


Sunday, April 21, 2013

A Different Way to Bend


"There's no room in here!"

Wayne Burby


The quote is from a great old guy I used to work with who was always griping at the mill that there wasn't any room.  He was a funny, sweet guy and honestly he was right; often times there wasn't enough room.  His saying has sorta turned into my own joke when I find myself tripping over stuff or looking for too long for things that I JUST PUT RIGHT THERE!!!

I recently went on a cleaning spree and tossed pieces of wood and took stuff to the salvation army in order to have a common area where all my patterns, papers and forms can go in a somewhat logical way. 

The picture above shows a bench I'm building for a client and while I have wanted to build this for awhile, the prospect of 14 bending forms and the subsequent 28 clamps was a bit much, but the book also had this board that had holes drilled in and pegs, sorta like my own little Plinko board. 


Here's a better shot below.  The turned and steamed pieces, Maple in this case, are threaded thru the pegs and thus held in the right bend for a few day in the kiln, then taken out done.  The best part is the they can be stacked two high, seven wide so I can do all 14 on this one 2x16x 20 piece!


And here's the first one steamed and bent.  The thin piece of wood prevent denting.  I finish turned the tenons top and bottom before steaming and while I seriously doubt the sizes to hold, it would sure be nice if they did.  I turn my tenons on the lathe but once they are bent I can't so I'd have to size them by hand.  Not a huge deal but much faster on the lathe.


Another thing I've recently tried and it works is doubling the slats for my rockers and then doubling them again between the clamps.  I used to do these one at a time, and man dragging those clamps around was a pain.  But now I can do four with just two clamps.  The Irwin clamp pulls the middle together, and the K-bodies finish the clamp and hold it in place.  So for one chair I went from seven forms and 14 clamps to 4 forms and 4 clamps. 

Sadly Wayne isn't around anymore, but I did laugh to myself thinking of Wayne and his comments about room.  I think he would approve.


Sunday, November 25, 2012


Even in Kyoto--
hearing the cuckoo's cry--
    I long for Kyoto.

Matsuo Basho


 Here above you can see another arm chair.  I really want to make a birdcage style ( with a double crest rail) but without an order it's tough to find the time.


This post is about fixing bending breaks.  It's really pretty easy, the hardest part may be deciding which pieces can be glued and which have really broken and have to be discarded.  Generally, it depends on the depth and direction that the break is running.  If it's pretty deep, and is running in, then toss it.  Also, if the break looks like it's peeling apart, layers coming off, it's probably ok to glue.  But if it looks like a strait fracture, then better to discard.


I like to fix the stress fractures when the piece is freshly steamed, and thus green.  Polyurethane (Gorilla) glue works great.  Just work it into the break ( I use a feeler gauge ) and then wrap tightly with masons line and tape off.  Once the piece dries, a card scraper cleans it off and you're all set.


I put the steamed pieces in my furnace room to dry.  I have a floor fan blowing around and within a couple days the pieces are all set.  I've been doing a bunch of steam bending lately, as you can see.  Seen here are a few hoop backs and a couple of C-arm bends.


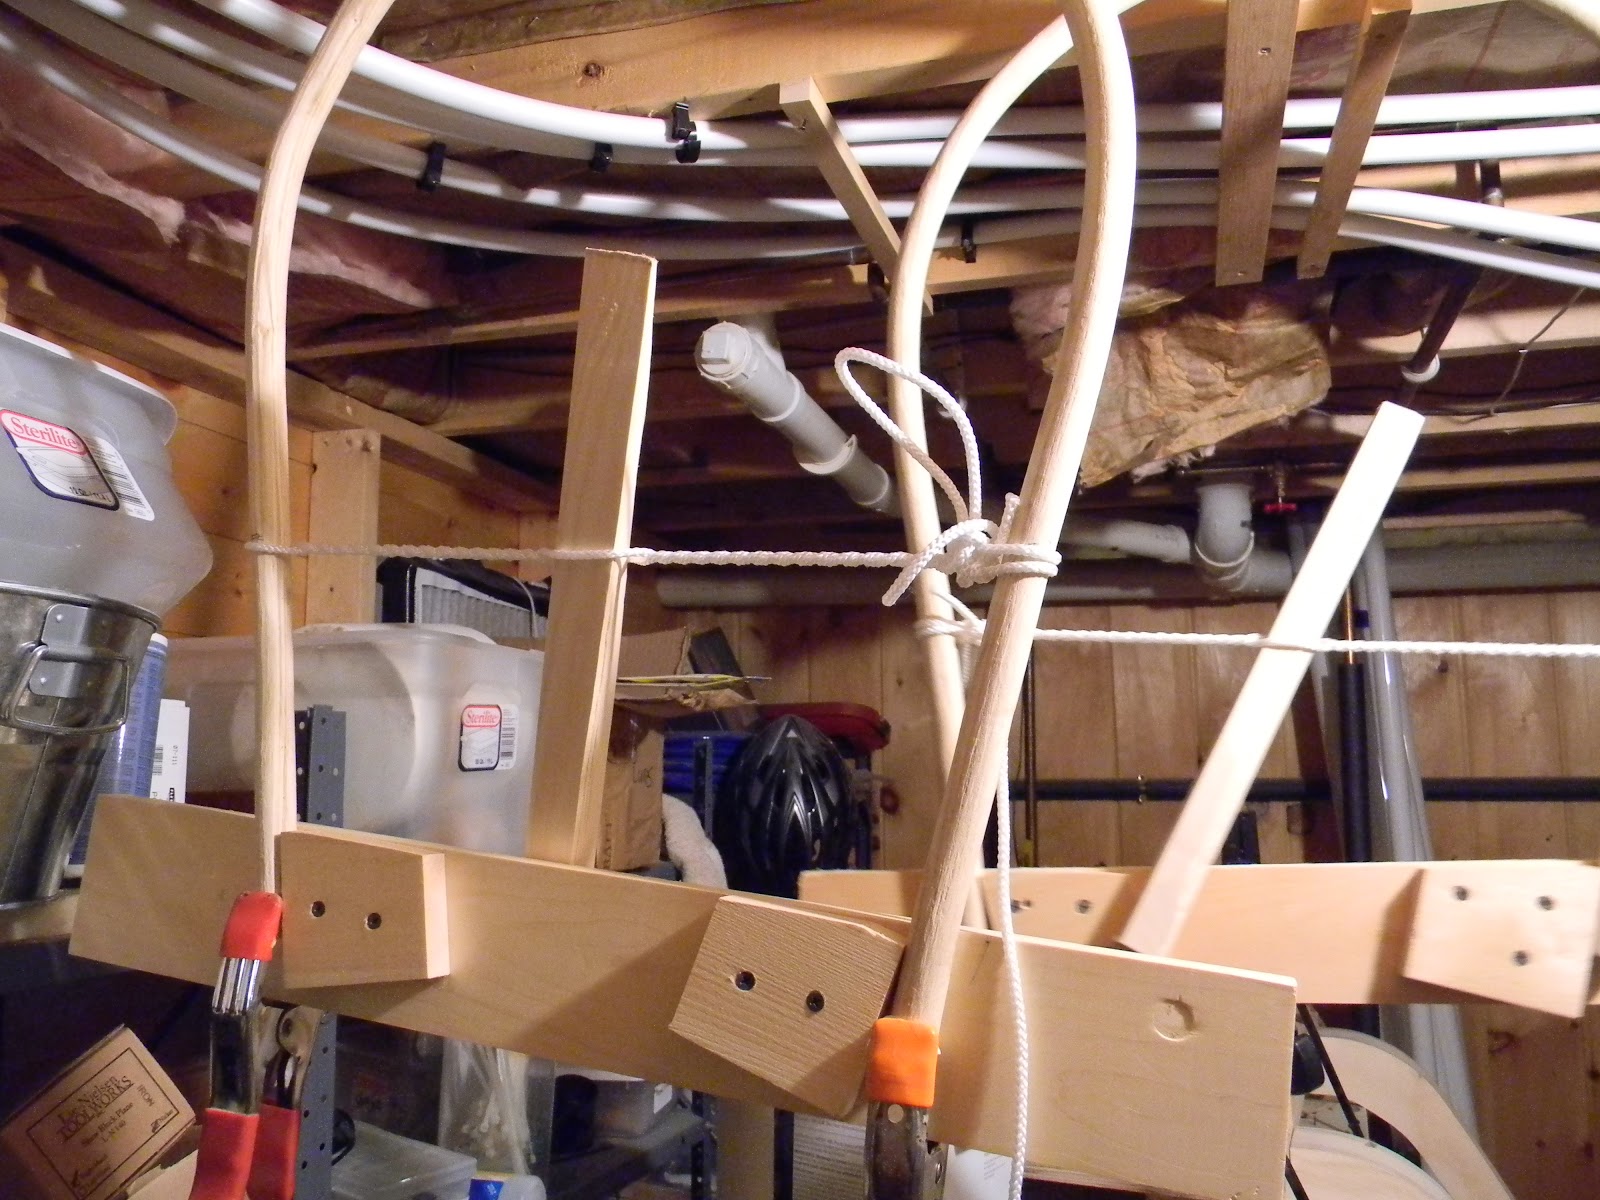
Here you can see the drying rack I like to use on hoop backs.  It's a board with a couple blocks screwed to it that hold the ends.  I then use a windlass to draw the hoop together, thus giving the hoop a slightly pinched look.  I think it looks better, though I wonder sometimes if I am the only one who sees it.  The board also keeps the ends in the same plane, which simplifies assembly.  I have also been steaming my ash longer than usual, which does seem to be helping, about an hour. 


Saturday, November 3, 2012

Continuous Arm, step by step..


"I feel like a wet seed wild in the hot blind earth.”
William Faulkner, As I Lay Dying


 I'm gonna do something a little different, or at least try.  I'm gonna have the next few posts cover the sequential building of a continuous arm.  This pic shows where I am headed eventually.   This chair actually started it's life green, then I painted it green, and it's final incarnation as black on red which to my eye was the best color.  It's a pain to repaint milk paint chair as you have to strip it to wood, then glue size, then paint up. 

Anyway, here goes.  I may have some gap posts but gonna try to do this one after another. 


The first thing to do on any chair, at least the way I do it, is to do the steam bending first off.  This allows the piece to dry and set while doing other things.  Below you can see a nice piece of white ash that will become the arm.  These arm pieces have to be especially straight grained as it's a compound bend and I can't use a strap.


I split this into two pieces, the heart becomes firewood but the other piece can make two arms.


 This is what you have to look out for..this whorl ended before the sapwood, so it wasn't a problem, but had this been all the way to the bark, I could not have used this piece for bending. 


 Here are the three pieces I got ready for one arm.  I always make extras and have them handy, and because I have two forms,  I can steam two at a time and bend.  Always have an extra or two on hand as this is a tricky bend and if you break one, you aren't dead in the water. 

My next post will show the actual bending and the mixed results. 


 Here is a look at my brake, a close copy of Pete Galbert's, only I scabbed a couple pieces of 2x6  to raise the effective fulcrum, and below a scan of the changes.  I've had a couple emails asking for the dimensions, so here it is. 


Saturday, August 18, 2012

Crest Rail Tenons


Out, out, brief candle!
Life's but a walking shadow, a poor player
That struts and frets his hour upon the stage
And then is heard no more: it is a tale
Told by an idiot, full of sound and fury,
Signifying nothing."
- William Shakespeare, Macbeth, 5.5


I'm gonna touch briefly on the crest for the rockers I make, specifically on forming the tenon that goes into the post.  I cut the mortise on a hollow mortiser,  which does a great job quickly.


Here's a look at the finished tenon where it goes into the post, nice and neat.  The crest is rough cut on the bandsaw and then steam bent and dried.  The tenon is formed after the drying, otherwise the size would be off.


I find the shavehorse is the best way to hold the crest, but you could use a vise.  The layout is done and the tenon is lined out at 3/8".  The back side remains flat.  I cut the cove with a drawknife, just proceed carefully and leave the tenon a little thick, then shave or scrape it to size when you assemble the chair.  You want a good fit, but believe me you don't want to have to beat it in with a hammer, a tight slip fit is best.


On another note, please check out a great blog by Wilson Burnham, an luthier from Allen Park, CO.  He had a great blog here, check it out.  I got the idea for the literary quotes from him, by the way.  

Tuesday, July 24, 2012

Steam Bending Kiln Dried Cherry, Second Try

“I was depressed, but that was a side issue. This was more like closing up shop, or, say, having a big garage sale, where you look at everything you've bought in your life, and you remember how much it meant to you, and now you just tag it for a quarter and watch 'em carry it off, and you don't care. That's more like how it was.”
Jane Smiley, A Thousand Acres


 First off,  here's a pic of my two latest chairs.  They're the same save for the colors, one is brownish and the other is almost black with a hint of brown underneath.  They are going to a gallery,  The Gallery at Frenchmans's Bay, which is in Somesville, MDI.  I was excited to get in there as there are pieces by builders that I have seen in magazines and such.  In September Tyra, the owner, is having reception so hopefully I'll get to meet some as well.


 As you may remember from my last post, the posts cracked when I tried to steam bend them.   So, I soaked the new pieces for a few days in some water, hoping this would soften the fibers somewhat.


I also steamed them longer and closed the door on the steambox to raise the temperature a little.  I also tried to think of a way to use straps to support the bends.  Time for some honesty...I use straps.  There, I said it.  Wood bends, or rather compresses, a lot.  Wood expands very little, ie it can not be stretched.  What a strap does it turns the whole bend into compression by holding the ends.  But I could not think of a way to use straps.  And then it came to me, sandwich.  I would sandwich the pieces between forms, rather than stretch them around the form.  I do this on the crest rails all the time, more for a more consistent arc than to ward off breakage, but the theory is the same.


So I cut out some sandwich pieces and quickly sanded them and steamed the posts for an hour and a half, and then started the bending.  And it worked!  I had to frig with the clamps a little, but the bends look good.  Of course its a long way from being dried and done, but it's a good (read better) start.


  I also want to thank Ray Duffy, a chair maker from Central Mass, who graciously offered to get me some green cherry after my last bending debacle.  And another thanks to Wilson Burnham for his blog post on axe handles.  I asked Wilson a question about the general shape of axe handles and he took it and ran...great post and great blog. 


Friday, July 20, 2012

Steam Bending Kiln Dried Cherry

“I wanted so badly to lie down next to her on the couch, to wrap my arms around her and sleep. Not fuck, like in those movies. Not even have sex. Just sleep together in the most innocent sense of the phrase. But I lacked the courage and she had a boyfriend and I was gawky and she was gorgeous and I was hopelessly boring and she was endlessly fascinating. So I walked back to my room and collapsed on the bottom bunk, thinking that if people were rain, I was drizzle and she was hurricane.”
John Green, Looking for Alaska


 Well, as you can see, less than stellar results.  I kinda sorta thought this would happen, or maybe at least I wasn't totally surprised.  I think a few things made this happen.  One, and most obviously, using kiln dried wood.  Usually I use split green ash, and it bends beautifully.  Second, I think I placed the clamps in the wrong place, on the ends.  I should have started on one end and worked my way up.  And lastly, I left the door of my steam box open in an attempt to keep the tenons out of the steam.  I stuffed a towel around gaps, but there was a fair but of leakage, so I think the temp never really got high enough.  The piece seemed "dry" when I took it out, and not really all that hot.  If you can't hold it in your bare hands, it's about right.  
I should back up and say that I am building a cherry rocker and the only cherry I have is kiln dried.  If I can't get these posts bent, I may have to see if Matt can get me some green stock, or at least air dried.  When wood is kiln dried ( and a lot depends on how it is dried, the temps of the schedule etc.) sometimes the lignin can become set, meaning it can't be bent.  This is why kiln dried wood is stiff, whereas air dried is more flexible.  

Because there is no cherry growing around here, if I can't get these bent this chair is dead in the water, so I have to come up with something.  I remember reading an article years ago where Russ Philbeck, a chair maker in So. Cal. used k.d. wood but he soaks it in water with a little fabric softener in it ( it allows the water to soak in better by reducing the surface tension).    So I filled up a PVC pipe with some water and am soaking the new posts til maybe Sunday, then I'm gonna steam them for at least 1.5 hrs with the door closed, and be very careful, and quick, with the clamping....pretty much everything I didn't do the first time around.  We'll see, hope it works, cause if not this chair is done.


It amazes me how few parts it takes to build a chair.  These are all the parts, save for the the spindles and the rockers.  The spindles are already drying after steam bending.


The other problem of the day.  I had the second coat of a multi-layered paint job, and I noticed a timber break that I somehow missed in the assembly of this chair.  A timber break is when a tree is felled over another tree and breaks, but not in two, rather it creates internal breaks that rear their ugly heads later in the assembly.


As upset as I was, better to find it now than later, believe me.  So I flooded a little epoxy in the back break and some super glue on the front, a couple hours later and some sanding, good as new.  It does set the painting back but like I said, better now than years later in a clients house.  So, a good bad day, I guess.


Here are  the two chairs, before the painting.  One is gonna be a brownish, and the other, the one with the break, is gonna be more black.


This shows the importance of using green, riven wood to steam bend.  It makes everything else easier. 
Easy to the point where it's easy to get complacent about bending, and then you try to bend kiln dried, and, well, see above.

Sunday, October 23, 2011

Duh, and a Moose


The other morning I was waiting with Erinn for the bus.  We were at the end of the driveway, see below,  and she said I think that's a moose over there.  And sure enough, a big bull was standing in a mowed field across the road, about a 200 ft. away.  He was close enough that we could see his breath in the cool morning.  We watched him for  about 5 min., until the bus showed up.  He watched the bus and was still there after it left, all the kids' faces pressed to the windows, the younger kids waving to him.  We used  to have a small moose that would come around quite a bit, so much so he was named Manny.  I wonder if this is Manny all grown up. 


The other day I had one of those duh moments.  Not that I have a hard time turning stretchers, but I always end up thinking there has got to be a better, or at least a more consistent way.  They sometimes come out lopsided.  I use a pattern from Drew Langsner's book a rough guide and just kind of eyeball it.  And I'm not sure why I didn't think of this, I don't know, years ago, but I cut the pattern to create a pattern that I could place directly on the turning.  This way I could see lumps and imbalances and correct them.  Such a simple fix.  Stretchers are harder, no, trickier to turn than they appear, especially the center one as it is very visible and also it tends to vibrate as it gets thinned out.  Sometimes the muse takes her time. 


In response to several inquiries regarding legs and rivings,  I am going to start selling turned legs and posts as well as rivings for spindles and such.  Around here, there is plenty of maple, as you can see below.  I usually get my hard ( a.k.a. sugar and rock ) maple from a local firewood dealer who will pick out the better logs for me.  For turnings you really don't need to be as picky as you do with the ash that is used for rivings.  I do split the pieces out by hand and rough them out to rounds.  I then let them dry for a week or two and then turn them out.  I find that the details hold better, and the legs and arm stumps have a lot less warping.  This makes them a little easier to ream and place properly. 


 Above you can see the baluster turnings for the legs and arm stumps.

 Below are more legs....from left to right are double bobbin, baluster, vase and a back post for  a side chair.  The patterns are for a Fan Back Arm Chair that can seen on my site.  I can also custom turnings.  In the second picture down you can see another baluster, a Philly front and back leg, a vase and at the bottom a bamboo leg for a rodback.  I also do stretchers, both bulge type and box stretcher.


Here you can see the rivings out of white ash.  There isn't any oak up here, but I actually prefer ash.  It finishes better and shaves just as well.


Below is the brake I use to split out ash into the rough pieces needed for spindles and such.  I carefully follow the grain so it can be shaved or steam bent.


As to the prices, here goes...

 Turnings-
  • Legs- double bobbin, bamboo-$14
  •            baluster- $18
  • Fan Back Posts-$25
  • Fan Back arm chair posts-$30
  • Stretchers- side $9, center $10
  • Arm stumps-$12
Rivings-
  • Spindle stock 24" $3.50, 30" $4.00
  • Bow, arm  48" $15, 60"  $25.
I can also sell steam bent parts arms and such, not sure on the price on the bent pieces.  This info will be going onto my site soon.