Showing posts with label Sharpening. Show all posts

Sunday, July 19, 2020

Sandpaper from Lee Valley

      
     But I would do it all again, every bit of          it.  I would lose him again just to have          him again for an hour, for a minute, 
      for even a second

     Lee Smith, Fried Chicken


If you have never read any Lee Smith I highly recommend her. She is subtle and nuanced. She reminds me of Flannery O'Conner with a little bit (lot bit?) of Bobbie Anne Mason.

While setting up shop again and  looking thru catalogs and websites I stumbled across this 3m sandpaper from Lee Valley that is pretty amazing.
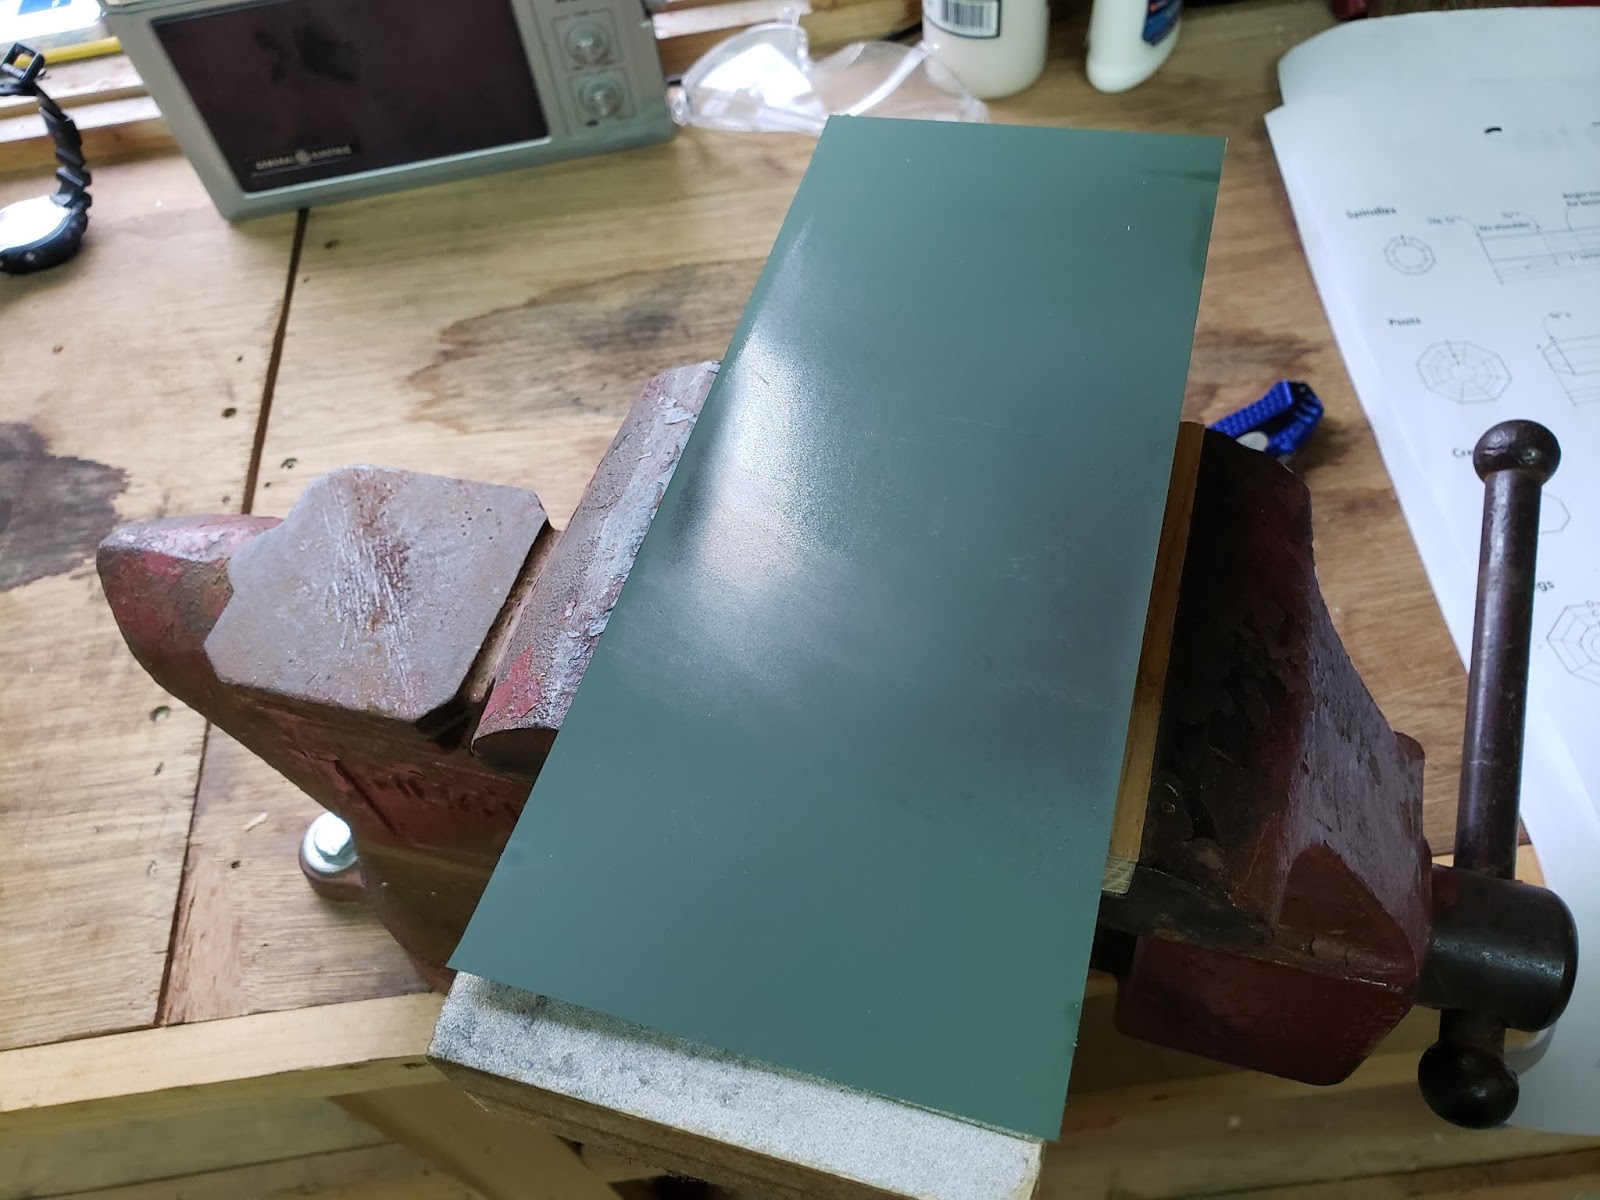


If you've been reading my blog you know that I use sandpaper to sharpen my draw knives.  It's not that I don't think water stones don't work they do. But the narrow blade seems to dish the stones a lot so I spend a lot of time flattening the stones.  So I use a 1½ block of MDF in a machinist vice. A piece of 150 grit sandpaper glued to the top holds the paper on top so I don't need to futz with adhesive when running thru the grits. The paper is available in 15ų and also 5ų (around 1000 grit) and an amazingly fine .5ų (around 6000 grit) which leaves an absolute mirror polish.


In the past I used automotive sandpaper which worked fine and still does but this paper is different.  The 15ų (600 grit) has a really solid backer paper which doesn't rip in my hand held blocks I use when I'm on the horse (see below).


These blocks work ok. Could be better and maybe someday I'll come up with something but
when you're busy well you know.


Monday, June 15, 2020

Sharpening Carving Gouges


She started up her walk. Then she seemed to remember something and came back to look at him with wonder and curiosity. “Are you happy?” she said. “Am I what?” he cried. But she was gone—running in the moonlight. Her front door shut gently.

Ray Bradbury, Farenheit 451


So confession time. I'm not a great carver and its not something I particularly enjoy.  I also have to admit to using rasps more than I care to admit. And while I'm not very good at carving I am, or rather was, not very good at sharpening carving gouges. As I have stated before my goal in sharpening is speed and repeatability.  I sharpen to get back to work. Unlike Abe Lincoln I derive no pleasure from sharpening.  That having been said it's important to not sharpen because you don't like to.


So I don't even know what rabbit hole I was down when I saw how you can use the little Tormek holder to sharpen carving gouges using their tool. Which is great but it is spendy and I'm pretty happy with my methods but it did plant the seed of how to adapt my Veritas strip sander to their guide bar.

I bought the guide bar from Tormek (actually sharpeningsupplies.com) and after some head scratching and hole drilling it works amazingly well. This is the position of the gouge and the best part is the belt is running away from the edge so you can't tear the strip. I run the tool all the way from 15ų (about 800 grit) to 5ų (about 2000 grit and they are scary scary sharp. Just amazingly sharp. It's super simple too. Just put the gouge in the holder up to the ferrule and use a magic marker to color the bevel and check the point of contact. Once it's good lock the bar in place and run thru the grit. Super simple and repeatable.


Here's my latest chair, a Contemporary rocker, waiting for paint. Really happy the way this one came out.


Sunday, November 18, 2018

Ax


He hoped it would snow recklessly and bring to the island the impossible winter purity; so rare and precious, he remembered fondly from his youth.

David Guterson, Snow Falling On Cedars 


I don't use an ax everyday in my shop. I do use a small hatchet, actually it's a shingle hatchet. But I did want to have a decent ax so I bought this one.  It's has very good balance and heft.


Here you can see what I use to sharpen my axes. I don't use stones; instead I prefer using a Nicholson single cut bastard file. I don't use stones because lately I've become keenly aware that I spent a lot of time over sharpening things.  I also find that things like draw knives and axes can really wear out stones and thus I have to spend a lot of time flattening the stones.  


I also wanted a nice sheath for the ax so I got some leather and used some paper to make a pattern and then cut the leather and riveted it together. A small strap holds it on.  I also put some snow seal wax to deepen the color and protect it from the elements. 


  I also put some snow seal wax to deepen the color and protect it from the elements. 


Wednesday, December 4, 2013

New Blade


"God, how I ricochet between certainties and doubts"

Sylvia Plath


First off I have to apologize for my lack of substantive posts of late. Just life getting in the way I guess. Lots of personal stuff...waiting for sweet boredom. That'd be nice.


Anyway, enough about me. Above you see my three favorite spokeshaves. The one to the left is a Lee Valley round bottom, the middle one is a Lie-Nielsen, and the right one is a cherry one I built years ago before I even know how to build chairs. Its based on a kit from Daves Shaves as seen in American Woodworker years ago.  The Lie-Nielsen is a beautiful tool and I use it all the time. I'm not super crazy about the iron and will be replacing it come Christmas.
I love L-N tools, don't get me wrong and I have the credit card bills to prove it. I'm just not super crazy about the steel used for the irons. To me its just too hard. I like good old high carbon. Easy to sharpen and given it's small molecular structure it get wicked sharp. Or rather wicked shahhhp.


Which brings me to...my favorite spokeshave. Like I said I built this before I could build chairs. Back when I had a jobby job and all I did was build tools and jigs and such. Ahh the good old days. I don't build jigs or tools anymore. No time for that. Anyway, I built this spokeshave and despite all that is apparently wrong with it it works wonderfully.   The wear plate just ahead of the blade is maple and has a pretty significant groove worn in it from spindle work. If memory serves it had a brass plate but as the blade narrowed I switched it out for maple.


But all good things end. And the blade has been sharpened to the point of uselessness.  So I broke down and bought a new one from Ron Hock, making sure it was high carbon/. Above you can see the original (top) vs the new one. Quite a difference as you can see.


Here's a groove worn in the toe piece. While it opens the mouth, it hasn't proven to be a problem as it registers the spindle during the cut. 

Wednesday, September 4, 2013

Chair Seat


Experience is simply the name we give our mistakes.
Oscar Wilde


 Used to be I would leave the sightlines and the different scribblings that comprise a chair on the bottom.  Never really gave it much thought. No one ever saw it and it wasn't painted so what's the big deal.  But lately, not really sure why, but this struck me as something of a short cut...lazy maybe.  So I have been planing the bottoms just before assembly.

Also I now use a clean rag when I wipe the finish on the bottom of the seat.  What happens is by the time you get around to wiping the oil the milk paint has been sanded three or more times, so a lot of color gets transferred to the seat in the oil.  I know this is being very persnickety but it bugs me.  I like to flip the chair over and see a bright, clean surface.


Here are some different shots of a seat I recently made for a rocker.  I actually timed myself and came in at just over an hour, not bad.


This is a nice curl of end grain.  The above drawknife is made by, I think, Ray Larson. I takes a wicked edge but due to the very low angle is really only good for pine and butternut.  But even so, a small price to pay for a tool that cuts like this one. 


And believe it or not this girl starts 3rd grade tomorrow...tempus fugit.  


Sunday, June 17, 2012

Crooked knife


Charlotte: [Bob is recollecting when he first saw Charlotte, in the elevator] Did I scowl at you?
Bob: No, you smiled.
Charlotte: I did?
Bob: Yes, it was a complete accident. A freak. I haven't seen it since. Just that one time.
[Charlotte smiles]
Bob: Like that, but bigger... bigger... mm-hmm... well, not that big!

fr. the movie (2003)-- Lost in Translation, written and directed by Sophia Coppala


I'm not much on garage sales, at all.  Some people are and that's fine but I am trying to reduce my pile, not add to it.  But my oldest daughter has wanted a pogo-stick for awhile and the other day I saw one at a sale so I stopped.  I bought the Pogo-stick and as I was leaving I noticed a beautiful crooked knife on a table for $1.00, so of course I bought it, thus adding to my pile.

For those of you who may not know about these traditional Indian tools, they are essentially a one-handed draw knife, which frees the other hand to hold the work, seen here.


I believe this knife, and perhaps all knifes, were intended for baskets.  I say this because the blade is double bevel, thus making it a wedge.  Indians around here and in the Bangor-Old Town area use Brown Ash to make their baskets.  When pounded the trees separate at the annual growth rings, and then these strips are pulled apart, making strips that are then used to weave.  A crooked knife is used to further split the splint, making thinner pieces.  It is also used to shape the handles and the rim pieces.


I have seen a few crooked knifes but this one is a little different.  It has a brass ferrule, usually they are wrapped with fine copper wire, and the handle has ribs, beautifully done, and a little swelling where the neck joins the handle.  Obviously this was a special tool.


The advantage of a crooked knife is that they can be used one handed.  I wonder if they had shave horses if they would have adopted two-handled draw knifes instead.  I don't think this tool will see much use in my shop, but it is a beautiful tool.

Sunday, March 11, 2012

Big Slick

If not for the sea, we would have to carry our boats about.

Norwegian saying


For those who have followed my blog for awhile, you have seen this boat before.  I started it a couple years ago, and after a brief, well, a year long break, I am getting back into the boat shop ( garage) to finish it up this summer, come hell or high water.  When I was building it, I wanted to have a big slick but 1. I wasn't really sure how much I'd use one and 2. they are pretty spendy on Ebay, so when I saw an article on building one, I decided to.


The article called for a blade made from a leaf spring, so I got one from a friend and cut to length and then drilled and tapped the holes.  I've had a fair bit of experience tapping metal when I used to weld, but tapping this was tricky.  The steel is hard, not super hard but harder than most metals, so you have to drill a bigger hole and use lots of oil.  Even so, I broke one tap.  Below you can see the size of the tool.


The blade is held in place by screws, so I guess you could change out the blade to a straight one for timber framing work, but for my purposes, the sweep on the leaf spring works great because it clears the handle and allows  me to pare easily.


Here you can see how much sweep it has.


 I have yet to harden the blade,  but I am thinking at about 25º on the primary bevel will be about right.  Despite it's impressive size, it's a paring tool...the knob end rests in your shoulder and you push with whole body.  The handle is white ash but about any hardwood would work.  After syrup is over, I'm getting the boat back out, maybe three more weeks. 
 I am really looking forward to getting the boat in the water, should be a lot of fun.  I've read that the time spent in a boat is inversely proportional to the size of the boat...I hope this one is the perfect size. 

Thursday, January 26, 2012

Making a Tenon Saw

 
The grave itself is but a covered bridge,
Leading from light to light, through a brief darkness! 
 
HENRY WADSWORTH LONGFELLOW, The Golden Legend


I've always wanted a tenon saw.  I did not want to pay a lot of money for one however.  So when I was in an antique shop, I bought a big hand miter saw.  You can pick these up for around $20 but the problem is they are too big, at around 21" long, they are simply unwieldy.  But I thought if I cut one down, it may work.


So I put a 3/32 zip (cutoff) wheel in my 5" grinder and marked a line and in about ten seconds it was cut.  I should say two things here.  First off, if you buy one get a 5" angle grinder.  They are actually easier to handle and much more balanced than the smaller 4" ones.  Second, be careful with a zip wheel.  They can kick back quickly and violently.  I'm kinda lax about safety glasses, but I wear glasses and a shield with these things.  Anyway, quick work.  In the background you can see a flap wheel sanding disc that smooths out the edge.  These also work great on wood, if you can stand the dust. 


I jointed and filed the saw as usual.  For this saw, because tenon cutting is primarily a ripping cut, I went with 10º fleam, 10º rake and about 10º slope.  This is what Leonard Lee suggests in his book, so who am I to argue.  


Here you can see my setup for sharpening, the light is key.  


I usually stone the sides with a diamond hone to take the burr off; again Leonard Lee.


And here it is all done and put back together.  It's 5' wide and 16" long.  I cut about 5" off and it's amazing how it improves the balance.  Before it felt like a chainsaw, but now it feels like a really big handsaw, which...it is. 


It cuts really well too.  The weight is such that it really zips thru the wood.  I'm not sure how much I'll use it; I still prefer a bandsaw but at least I have the option now.


Below are a couple pictures of a Rod Back Arm Chair that was recently selected for the Society of American Period Furniture Makers  gallery show in Hartford, Conn. this spring and summer.  It's one of thirty pieces selected and one of only a few Windsors.  Needless to say I am honored and excited. 


Friday, January 20, 2012

Like New Disston 115 for sale

First and foremost arms are tools in the service of rival nations, pointing at the possibility of a future war.
Alva Myrdal


After much thought,  have decided to sell this Disston D115 panel saw.  This saw is pretty much perfect...the handle is beautiful rosewood.  According to Pete Taren at Vintage Saw, this is the best saw that Disston made. 

It can be found at ebay here.


I have been buying and fixing up old saws.  Maybe I'm just weird but I really do enjoy fixing these up.  I find filing them meditative, weird I know.  Such a simple tool, a handle and some spring steel.